
Introduction
This guide takes you through to steps to complete a mail merge utilising Word and Excel from the M365 suite.
Please note that in order to complete a mail merge, the desktop version of Word and Excel will need to be used. M365 Online apps do not currently support Mail merge.
This guide assumes that a word template and excel document with data has already been created.
Steps
Open your word document template you wish to pull data into using the word desktop app.
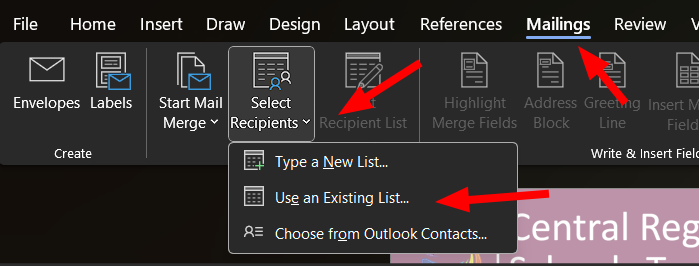
Once the document is open, select the mailings tab in the ribbon bar, followed by select Recipients and use an existing list:
3. Please now choose the Excel spreadsheet with the data you would like to merge into the word document. If the excel spreadsheet has multiple tabs, once spreadsheet has been selected, choose the tab with the correct data on.
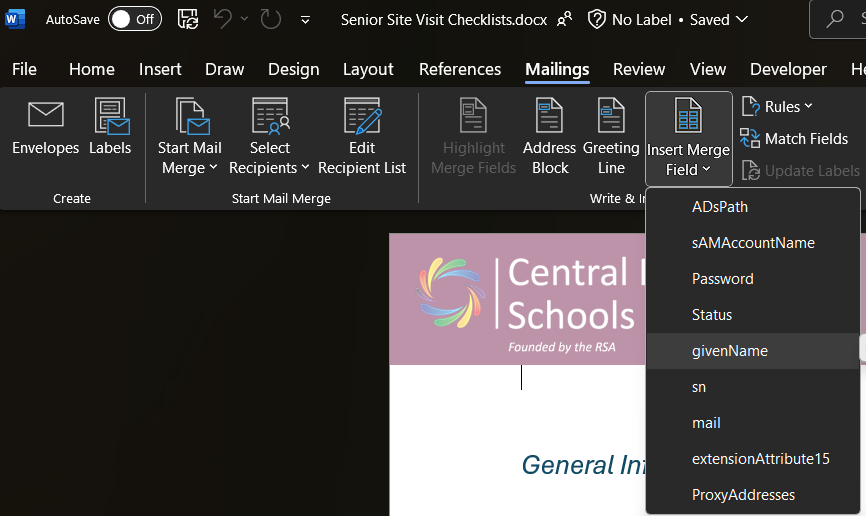
4. The data is is now loaded and can be used within your word document. Now you need to start adding placeholders for where you would like specific data to be applied from your spreadsheet. To do so place your courser where you would like the placeholder to go and choose the option "Insert Merge Field" and select the data would would like to place as shown below:
5. Continue to repeat step 4 until you have added place holders added into your word document where you need them.
6. You can now preview the data and check everything is where it is by selecting the Preview results button and using the left and right arrows to browse through each row.

7. Once your happy, select the finish & Merge option as shown in the image above and select how you would like to save this data.
Additional Resources
