Introduction
This guide provides instructions on how to set up and use the Epraise Staff Messenger. The Staff Messenger allows communication between teachers, students, and parents. It’s designed to facilitate direct messaging for individuals, groups, classes, or year groups.
Setting Up the Messenger
Before using the Staff Messenger, ensure that your school has enabled this feature in the Epraise system. You may need to configure settings such as message quotas and frequency restrictions to suit your school’s needs.
Steps to Use the Epraise Staff Messenger
1. Accessing Messages
- Navigate to Me > Messages or click the Messages quicklink icon.

2. Creating a New Message
- Click on New on the right-hand side of the screen.
- In the 'To' field, start typing the name of a recipient or group. You can also use the Browse button to search for different groups like classes, year groups, or all students.
- If needed, enter a student's name in the About box to generate a list of recipients linked to that student.
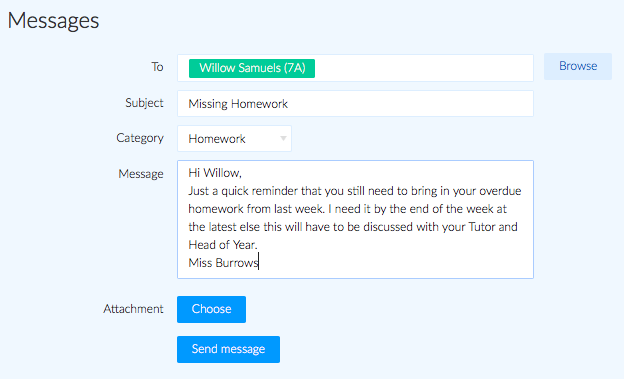
3. Adding Attachments
- Click on the Choose button to upload a file.
- Drag and drop the desired file into the 'Drag & drop files here' box.
- After uploading, select the file from the list below the box to attach it to your message.
- Note: You can store up to 50 attachments in your upload space.
4. Sending the Message
- Once the message is ready, click the Send message button.
- If you send a message to multiple recipients, such as parents or students, the conversation will be marked as completed, and recipients will not be able to respond.
Managing Your Inbox
Accessing and Viewing Messages
- All received messages appear in Me > Messages.
- The quicklink icon at the top will display a red bubble with the number of unread messages.

Message Status Indicators
- Unread messages are marked with a red line on the left.
- Messages that haven’t been replied to have a yellow line.
- The key at the bottom of the page shows the status and sender of each message.

Replying to Messages
- To reply to a message, click the message you want to respond to.
- Type your response in the text box and click Send reply.

Marking Conversations as Complete
- Once you’ve finished with a conversation, click 'Mark as complete'.
- Completed conversations will disappear from the 'Active and recently completed' list for students and parents after 30 days.
Viewing Older Conversations
- To view older messages, use the drop-down menu at the top of the page and select ‘Completed only’ or ‘All conversations’.
Important Notes
- Staff cannot delete messages, but they can mark them as complete.
- Only school administrators can delete messages in rare circumstances.
- If a message is sent to parents and students, it will be marked as completed, and recipients cannot respond.
Additional Resources
