Introduction
This guide explains how to add a shared mailbox to both the Outlook Web App and the Outlook Desktop application. A shared mailbox allows multiple users to read and send emails from a common mailbox.
Adding a Shared Mailbox in Outlook Desktop
Shared mailboxes typically appear automatically in your Outlook Desktop application after the IT team grants you access. You should see the shared mailbox listed below your usual inbox and folders.
If the shared mailbox doesn't appear:
Sign Out and Sign In Again:
- Close Outlook and reopen it to see if the shared mailbox appears.
Contact IT Support:
- If the mailbox still doesn't appear, please log a ticket with the IT team using the Helpdesk or email it@crst.org.uk.

Adding a Shared Mailbox in Outlook Web App
Unlike the desktop version, adding a shared mailbox in Outlook Web App requires manual steps:
Log into Office 365:
- Visit www.office.com and sign in with your school email address and password.
Open Outlook:
- Select 'Outlook' from the left-hand menu or find it in the "App Launcher" in the top left corner.

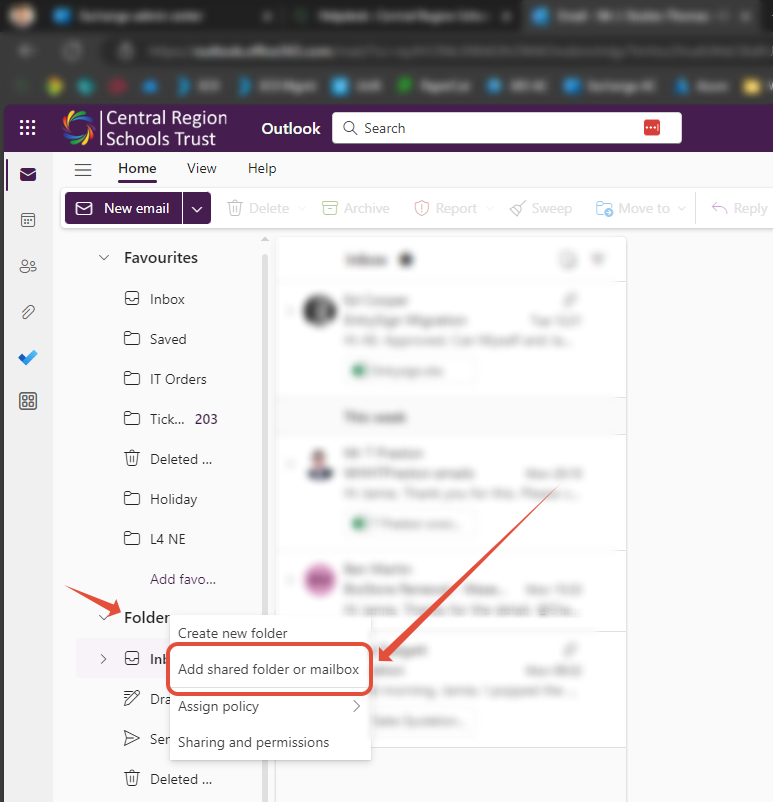
Add the Shared Mailbox:
- Right-click on the "Folders" button on the left-hand side.
- Select "Add a shared folder."
Enter the Mailbox Email Address:
- In the popup box, enter the email address of the shared mailbox you have been granted access to.
Access the Shared Mailbox:
- If you have the necessary permissions and everything is set up correctly, the shared mailbox will now appear in the left-hand pane, just like it does in Outlook Desktop.
- These inboxes will also follow you, meaning that any PC you log onto, they will appear without having to repeat the process.
FAQ (Frequently Asked Questions)
Q: I can't see the shared mailbox in my Outlook desktop app. What should I do?
- A: Try closing and reopening Outlook. If it still doesn’t appear, contact the IT support team at it@crst.org.uk.
Q: How do I access a shared mailbox on a new device?
- A: Once the shared mailbox is added, it will follow you on any device you log into. Simply log into your Office 365 account and the shared mailbox will appear in Outlook.
Q: I don’t have permission to access the shared mailbox. What should I do?
- A: Contact your IT support team to ensure that access has been granted to the shared mailbox.
Q: Can I send emails from the shared mailbox?
- A: Yes, after adding the shared mailbox, you can send and receive emails from the shared mailbox, just like you would with your personal inbox.